By
By
Overview
Using LaTeX to author a paper can be a tedious process when you're just getting started; however, after you're up-and-running, I found it a powerful tool to control the publishing process. Some of the advantages I've found:
- Documentation-as-Code along with version control.
- Ability to integrate with your codebase making updates seamless.
- Prebuilt templates that perfectly format based on a standard such as the American Psychological Association or APA format.
- Ability to insert advanced LaTeX such as math equations.
I wanted to document the process I ended up using. I hope it's helpful to you!
What is LaTex?
LaTeX is a software system that's used for document production. Instead of utilizing a graphical editor, LaTeX is authored using plain text and a markup language. Combined with the TeX typesetting system, the document is compiled into an output format.
Installing LaTeX
First, you need to get LaTeX installed. I'm running a Mac, and therefore I'm using the MacTeX distribution. You can download it here: https://www.tug.org/mactex/.
I find this distribution complete and easy to manage. An installer is provided that has everything you need to author and publish TeX documents. It’s also compatible with Intel or Arm (Apple Silicon) processors.
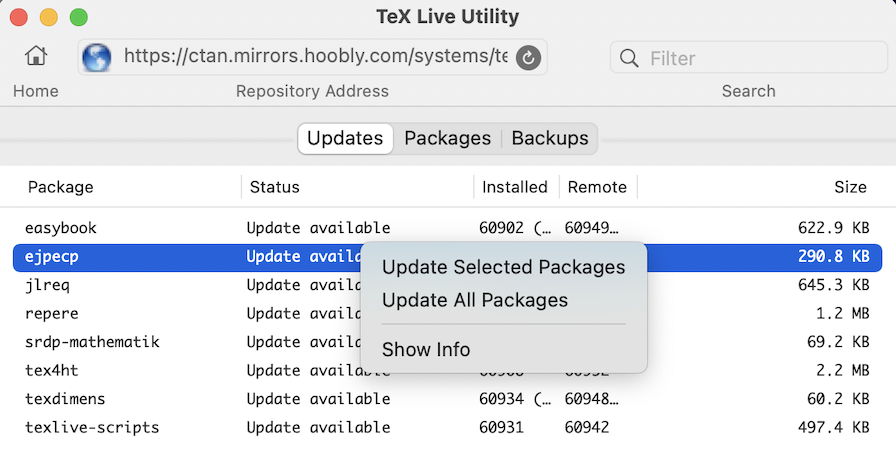
Updating the TeX Distribution
After installing the software, you need to make sure all appropriate packages are up to date. You can accomplish this by Launching the TeX Live Utility and running the Update All Packages command.
VS Code and LaTeX
Next is your Authoring Environment. The MacTeX distribution does come with an editor, but it is very spartan. Fortunately, VS Code has a wonderful extension that allows you to write your document directly inside your favorite editor and publish your document automatically as you edit it.
Install the LaTeX Workshop extension from the VSCode Marketplace.
A Cloud-Based Alternative
There is also a nice cloud-based solution called Overleaf. The APA Template is even available to get you started quicker. You can check out Overleaf for more information. The downside is that you need to be integrated with your coding environment.
The APA Template
I'll admit, having to build an APA formatted document from scratch with LaTeX would be a very different experience than what comes next. Fortunately, Daniel A. Weiss created a great APA template that supports the 7th edition and is included in the TeX Live distribution. As long as you've updated your packages as stated above, it should be seamless.
Be sure to check out the documentation (PDF). It clearly shows how to use the template and will help you with further customization.
Building Blocks of an APA Paper
Several sections of the TEX document end up creating all of the components needed for a paper. I'll go through each of them with code samples.
Document Header
Start by creating a new document with any name and add the extension .tex. Insert these lines at the very top. Note the \begin{document} and \end{document} tags. The rest of the paper will fall between these.
 \documentclass[stu]{apa7}
\usepackage[american]{babel}
\usepackage{csquotes}
\usepackage{caption}
\usepackage[style=apa,sortcites=true,sorting=nyt,backend=biber]{biblatex}
\DeclareLanguageMapping{american}{american-apa}
\addbibresource{bibliography.bib}

\begin{document}


\end{document}
We can see the documentclass is set to use the {apa7} template along with the option stu, which is a definition for formatting as a Student Paper vs. a journal article. Additionally, there is the \addbibresource{} definition which I'll cover later, that will help us add citations that are properly formatted into the document.
Title Page and Abstract
Adding a Title Page and Abstract page is a breeze. Just insert this between the beginand end tags.
 \title{Capstone Project}

\authorsnames{Brian Roepke}
\authorsaffiliations{Data Analytics, Golden Gate University}
\course{DATA190}
\professor{Dr. Professor Data}
\duedate{August 21, 2021}

\abstract{
  Bacon ipsum dolor amet jerky burgdoggen turkey...
}

\maketitle
What you'll also notice is at this point, the compiler will start to create your first PDF! Upon each change you make, you will see the PDF update. One of the great things about the VS Code integration is you can preview the PDF side by side and watch your changes appear as you make them. Just open the preview splitter window to the side, and you should see a PDF with a cover page, an abstract, and the first page of the paper. Magic!
Body and Sections
Next, we can author the paper. The general structure adds your first intro page under the \maketitle tag and then follows several sections and sub-sections.
\maketitle
Tongue sausage ground round capicola pork pancetta brisket, strip steak...
\newpage
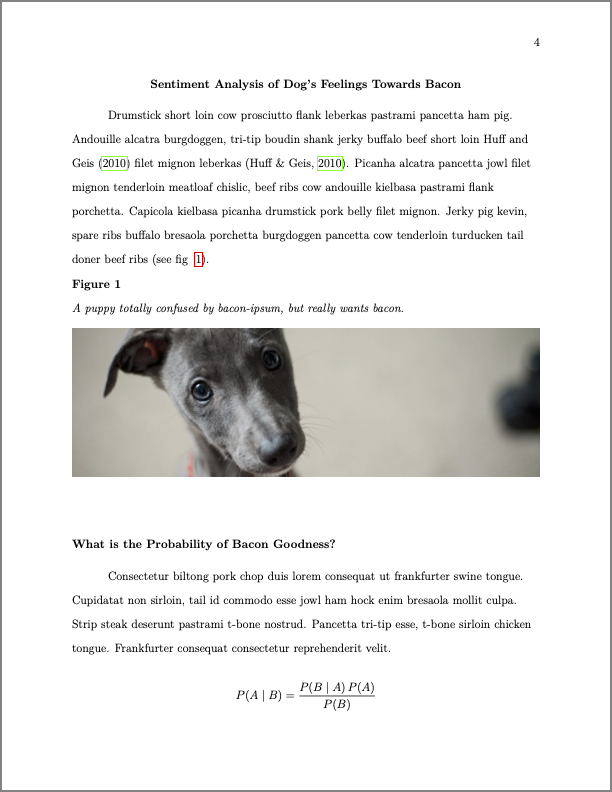
\section{Sentiment Analysis of Dog's Feelings Towards Bacon}
Drumstick short loin cow prosciutto flank leberkas pastrami pancetta...
\subsection{Other Sources of Bacon Goodness}
Consectetur biltong pork chop duis lorem consequat...
What is happening here?
\newpagedoes exactly that - puts a page break in the document and allows you to start a section on a new page.\sectionis the second level heading according to APA. It's Flush Left, Boldface, Title Case Heading\subsectionis the third level heading. It's Flush Left, Boldface Italic, Title Case Heading\subsubsectionis the fourth level heading and so on. There are five levels supported. Check out the documentation for information.
Figures
Next is an example of how to insert a figure, accomplished via an in-text reference using the following syntax:
(see fig ~\ref{fig:my_fig})
Then anywhere in the document, you create the figure with the corresponding matching label. There are additional controls for the placement of images that you'll find important as your document grows. There is a great answer on StackExchange describing the options.
 \begin{figure}[!ht]
  \centering
  \caption{A puppy confused by bacon-ipsum, but really wants bacon.}
  \includegraphics[width=\textwidth]{dog.jpg}
  \label{fig:my_fig}
\end{figure}
Citations
Adding citations is also incredibly easy. In the header of the document, we had defined \addbibresource{bibliography.bib}. Create a file with this name, and then you can add a citation to it using the BibTeX format like this:
@book{huff2010lie,
  title={How to Lie with Statistics},
  author={Huff, D. and Geis, I.},
  isbn={9780393070873},
  url={https://books.google.com/books?id=5oSU5PepogEC},
  year={2010},
  publisher={W. W. Norton}
}
And then, when citing in the body of your paper, you add the citation like this:
Andouille alcatra burgdoggen, tri-tip boudin shank jerky buffalo beef short loin \textcite{huff2010lie} filet mignon leberkas \parencite{huff2010lie}.
The output will look something like the below, showing both in text and classic citations.
Andouille alcatra burgdoggen, tri-tip boudin shank jerky buffalo beef short loin Huff and Geis (2010) filet mignon leberkas (Huff & Geis, 2010).
Working with a Reference Manager
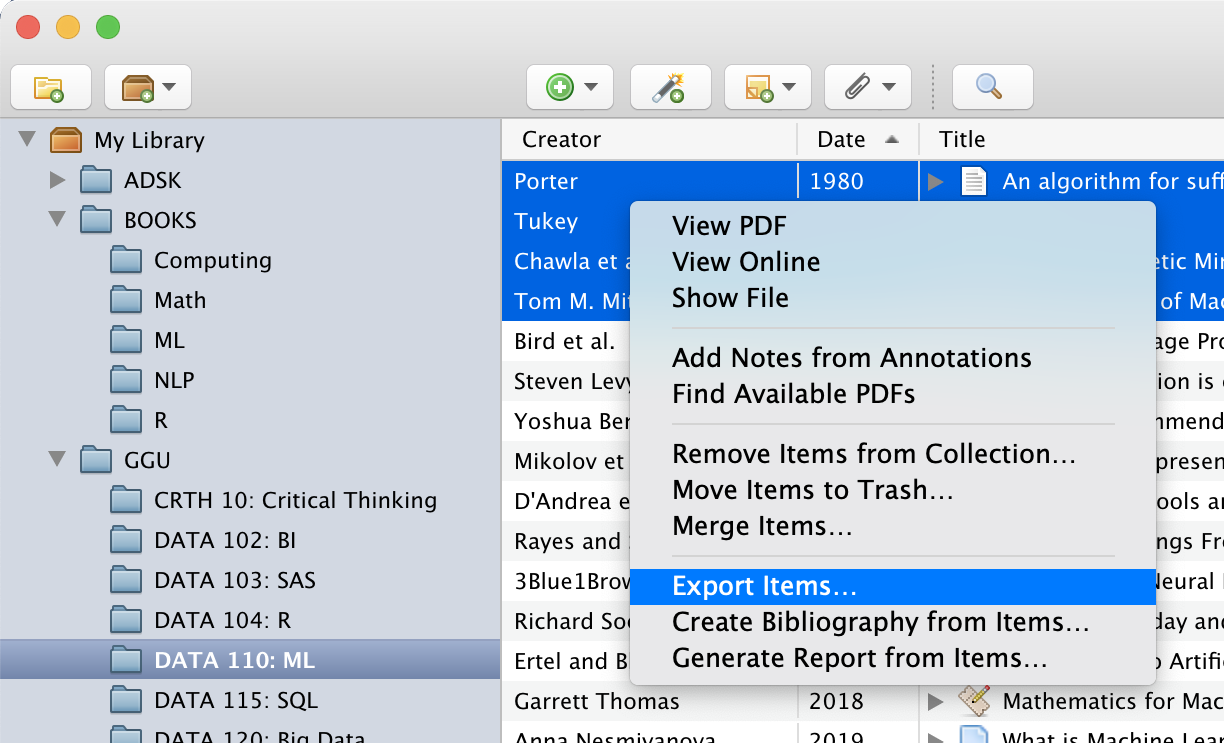
Note: If you use a reference manager like EndNote or Zotero, you can export your entire citation list as BibTex and paste it into the .bib file. I used EndNote for a good portion of my academic studies, but I recently switched to Zotero because it's excellent and free to use. Here is a quick flow on how you export your citations.
From the Zotero interface, highlight the items you wish to export and select the Export items... menu option.
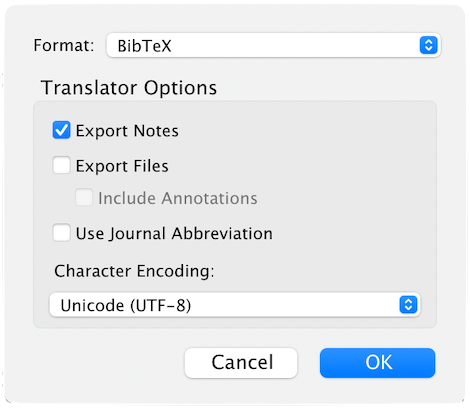
Next, select the BibTex option and save the file. From here, you can move these into the bibliography.bib file. Make sure to remove the file: key-value pair.
Integrating with Your Project Code
I mentioned above that one of the advantages of using LaTeX and VS Code together is integrating with your code automatically. You can easily reference images that were saved from Python directly in the references to the images in the LaTeX document.
If you're using matplotlib, add these two lines after your plot:
plt.tight_layout()
plt.savefig('images_path/img_name.png', dpi=300);
And then reference that image in your LaTeX document. Every time your plot updates, you won't have to worry about updating it.
Conclusion
This post turned out to be a little lengthy, but hopefully, it will help you set up and get your first document published. I've posted the source code on GitHub if you'd like to see the entire project.
Enjoy!