By
By
What is Mongo DB and Why a DataFrame?
MongoDB is in a class of databases known as NoSQL databases. NoSQL databases are designed to store and retrieve data without the need for predefined schemas, which is in contrast to relational databases, which require a schema to be defined before you can store data. MongoDB is a document store, which means it stores data in JSON-like documents.
I recently came across a project where I needed to connect to MongoDB and perform data analysis. One option would be to ask someone familiar with the database to extract the data into a format like CSV, which is easy to pull into Python. However, that's not an efficient way to get the latest data. I also knew MongoDB's persistence is in a JSON-like format, and as a Data Scientist, I preferred a Pandas DataFrame. As most Data Science practitioners know, once our data is in a DataFrame, we can perform any of our standard operations on that data from EDA, to Feature Engineering, to Model Selection and Evaluation.
Note: An even better way would be to extract the data into a Data Warehouse such as Snowflake via a tool like Fivetran. However, that wasn't practical at this point in the project; this was the next best option!
Creating Your Free Mongo DB Account
For example, we're going to use a free MongoDB Atlas account. Atlas is the cloud-hosted version of MongoDB, which includes a Free Tier which makes it ideal for learning before you start a bigger project or to give you a playground for experimentation. Let's go through the steps to create a free account.
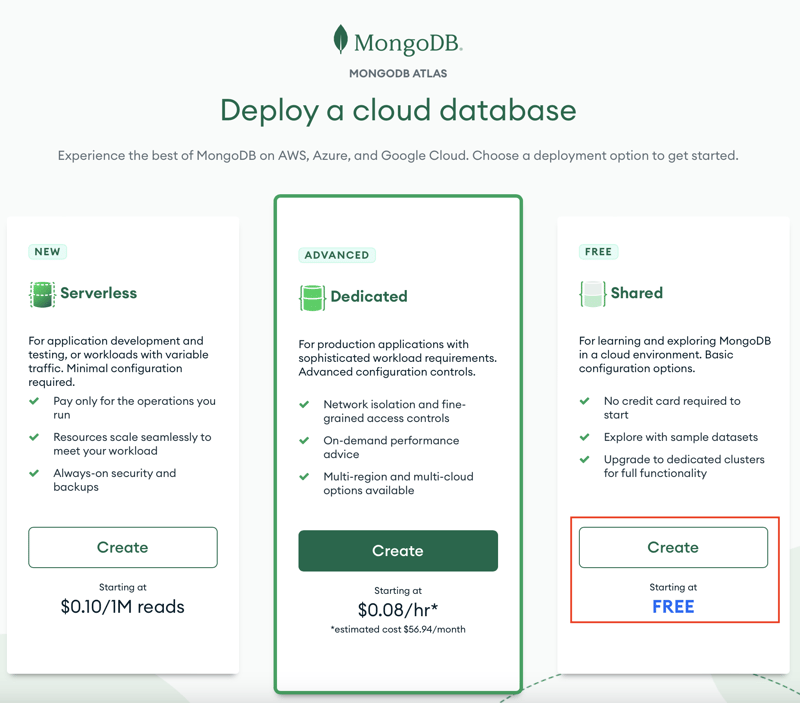
From the MongoDB Homepage, click the Try Free button and register a new account. Select the Free Shared option, which gets you started with a basic hosted database.
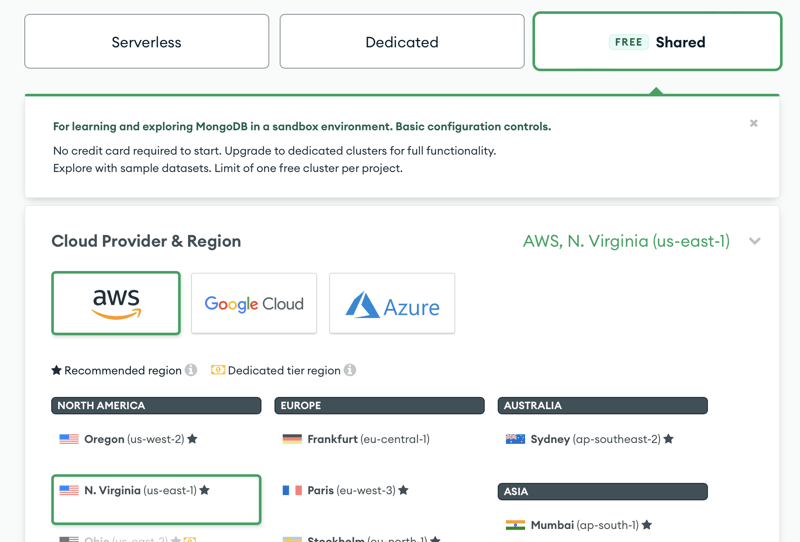
Next, continue with the Shared option and select your region and cloud hosting provider. I typically work with AWS, but for this example, any providers will work.
Finally, with the Cluster Tier settings, choose the M0 Sandbox option; the free option will give you a single-node database with 512MB of storage, more than enough for our example.

Next, we're going to get things configured.
Configuring Access
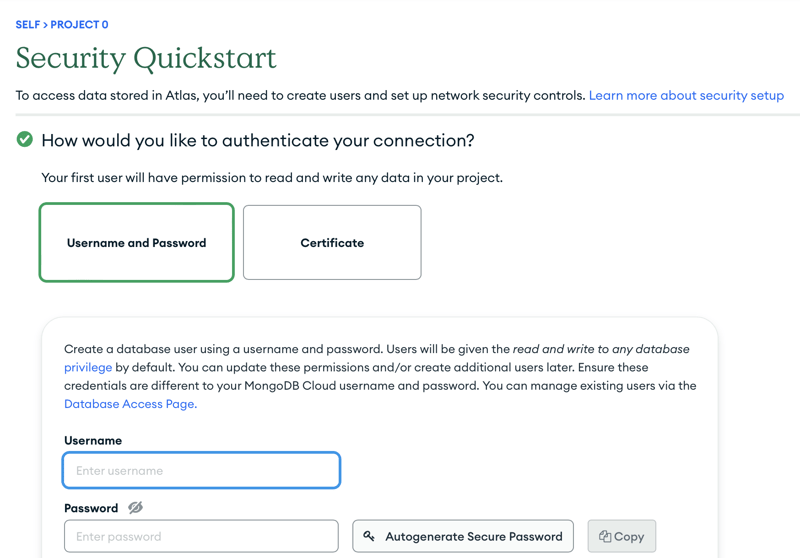
Next, we need basic configuration details like the user, password, and IP address information. Let's start with the username and password option. Create a user and let Mongo specify the PW for you. It will use one that doesn't require URL encoding (which we will handle later if you prefer).
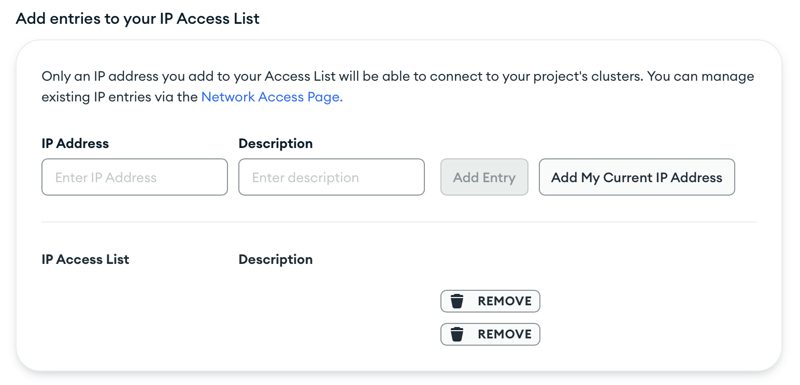
Next, we should only allow connections to this via IP addresses we trust. You can find your IP address with the Web Site WhatsMyIPAddress. Ideally, you should have a static IP address but for starters, use the IP4 address listed when you visit this site. You can always add more IP addresses later or even open it up to the world if you want (don't do that).
We're ready to get some sample data!
Installing Sample Data
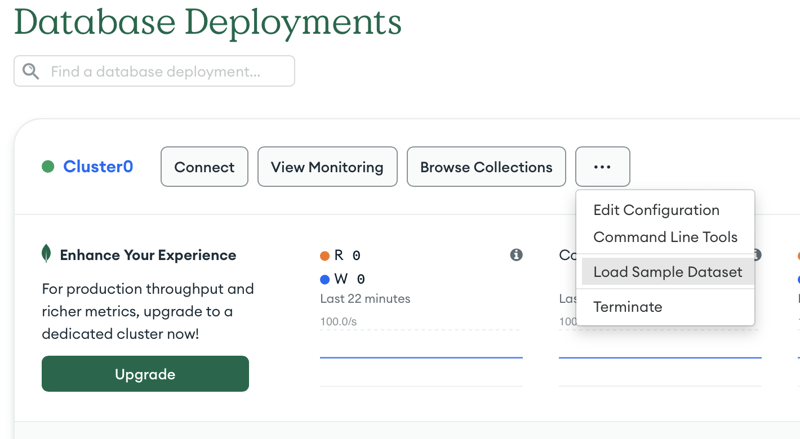
MongoDB provides a very simple way to get sample data that allows us to explore the database and learn how to interface with it. Click the ... button and select Load Sample Dataset.
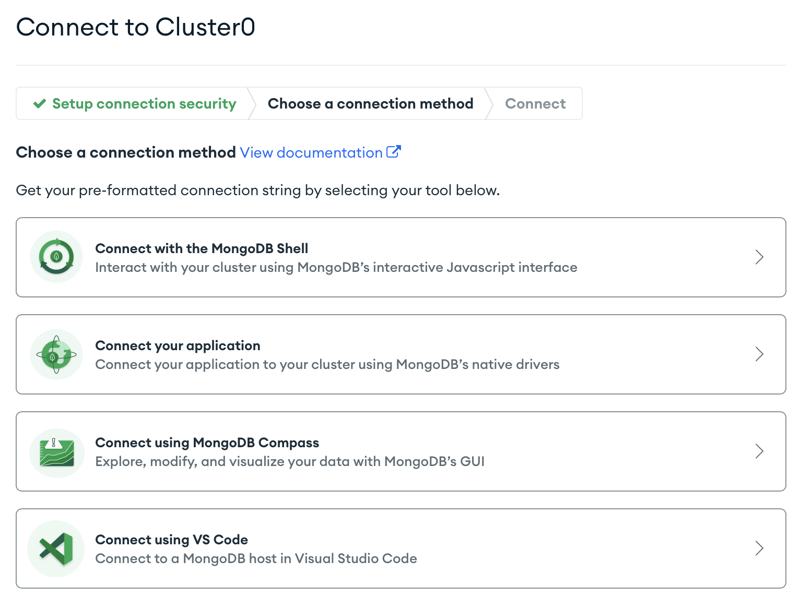
You can learn more about connecting to Mongo via the Connect button; however, I'll walk you through it next. One thing that is cool to explore is the VS Code extension for browsing your server. Check that out after finishing up this post.
Installing the MongoDB Python Client
To work with MongoDB Atlas, you'll need to install the Python driver with dnspythonpython, which you can install the driver with the following command:
python -m pip install 'pymongo[srv]'
Note: If you have previously installed pymongo try to uninstall that first and then run the above command.
Python Imports
As usual, let's import all the libraries needed for this. We have our standard numpy and pandas as well as os to get environment variables. We're also importing quote_plusfrom urllib, which will help with the username and password encoding. Finally, we have pymongo, the MongoDB Python driver.
import pandas as pd
import numpy as np
from pymongo import MongoClient
import os
import pandas as pd
from urllib.parse import quote_plus
from pprint import pprint
Connecting to Your Cluster
We first want to load environment variables into memory for our host, username, and password. Leveraging environment variables is a best practice when dealing with sensitive information. Search for tutorials on how to save and persist them with your OS. There are different methods for Mac, Linux, and Windows. The following code, however, is how you can easily load them into memory.
host = os.environ.get("MONGO_TEST_HOST")
username = os.environ.get("MONGO_TEST_USER")
password = os.environ.get("MONGO_TEST_PW")
Next, per the MongoDB documentation, we need to ensure any information in our connection string is properly URL Encoded like the username and password which can be easily achieved with the quote_plus function from urllib. Let's take a quick look at a sample password and how it is encoded.
fake_pw = "p@ssw0rd'9'!"
print(quote_plus(fake_pw))
p%40ssw0rd%279%27%21
Next, we construct our connection string with the following format and create a new MongoClient object called client.
uri = "mongodb+srv://%s:%s@%s" % (
    quote_plus(username), quote_plus(password), host)
client = MongoClient(uri)
That's it! Let's explore the databases on our server!
Get a List of Databases
Let's say we don't have access to the MongoDB console (which we might not if this isn't our sample data), and we can query the list of available databases with the following code:
client.list_database_names()
['sample_airbnb',
 'sample_analytics',
 'sample_geospatial',
 'sample_guides',
 'sample_mflix',
 'sample_restaurants',
 'sample_supplies',
 'sample_training',
 'sample_weatherdata',
 'admin',
 'local']
We can see all of the different sample DBs that we added. We will use sample_analyticsfor the rest of the post.
Get a List of Collections in a Database
First, we need to specify the database we want to connect to or sample_analytics as mentioned above, and then we connect to the specific db utilizing the client object we created before. We can see all the collections in the database with a simple print of the list_collection_names() method.
db = "sample_analytics"
mydb = client[db]
pprint(mydb.list_collection_names())
['accounts', 'transactions', 'customers']
And if we want to see a single record from the collection, we can do so with the following code:
pprint(mycol.find_one())
{'_id': ObjectId('5ca4bbc7a2dd94ee5816238c'),
 'account_id': 371138,
 'limit': 9000,
 'products': ['Derivatives', 'InvestmentStock']}
That's it! We're now connected to our MongoDB Atlas server and can start querying data.
Save a Collection to a Pandas DataFrame
Now, for the part you've all been waiting for, getting your collection into a Pandas DataFrame! which is easy to do. We will use the .find method to query the collection and then the pd.DataFrame method to convert it to a DataFrame.
mycol = mydb["accounts"]
df_accounts = pd.DataFrame(list(mycol.find()))
Now that we have a DataFrame let's take a sample of the rows and see what it returns, along with some basic exploratory peeks at the data.
df_accounts.sample(5)
                           _id  account_id  limit  \
672   5ca4bbc7a2dd94ee5816262f      120270  10000
1371  5ca4bbc7a2dd94ee581628ea      680724  10000
1087  5ca4bbc7a2dd94ee581627ce      639934  10000
1360  5ca4bbc7a2dd94ee581628df      486521  10000
1217  5ca4bbc7a2dd94ee58162850      212579  10000

                                               products
672      [InvestmentFund, Derivatives, InvestmentStock]
1371                       [Brokerage, InvestmentStock]
1087  [CurrencyService, Derivatives, Commodity, Inve...
1360      [InvestmentStock, Commodity, CurrencyService]
1217  [InvestmentStock, CurrencyService, InvestmentF...
df_accounts.shape
(1746, 4)
df_accounts.limit.describe()
count     1746.000000
mean      9955.899198
std        354.750195
min       3000.000000
25%      10000.000000
50%      10000.000000
75%      10000.000000
max      10000.000000
Name: limit, dtype: float64
That's it! Now that we have a DataFrame, the sky's the limit on what we can do with our data.
As always, the code used in this article is available on GitHub.
Conclusion
That's it! We created our Free Tier MongoDB Atlas cluster and configured it for access to our environment. We then showed you how to authenticate to your server and query the database on your server. Finally, we showed you how to save a collection to a Pandas DataFrame. With these basic steps, you can utilize the power of Pandas and Python to analyze data and even build any number of machine learning models. While we just scratched the surface of what's possible with MongoDB, with these simple steps, you can quickly start your data science projects with MongoDB Atlas.