By
By
Why do I Need to Normalize MongoDB Data in Snowflake?
MongoDB is a document database that stores data in JSON-like documents, and it is a NoSQL database that is very popular for web applications. When using your MongoDB data for Data Science or Analytics, you'll probably be much more comfortable if the data is structured like a normalized relational database. A normalized database reduces redundancy by storing different data types in its tables. In this post, I will show you an approach that works very well to normalize MongoDB data in Snowflake.
In a previous article, I talked about how to get MongoDB data into a Pandas Dataframe. However, to speed up your data science and analysis, having it in a relational, clean format will benefit you greatly.
Note: For an introduction to Snowflake, check out: Getting Started with Snowflake and the Rise of ELT Workflows in the Cloud.
MongoDB Documents
Let's take a quick look at what MongoDB refers to as a document. A document is a JSON-like object that contains a set of key-value pairs. Below we see the Keys and Values for the document. There are simple cases like kind below where the value is Organization; however, there are more complex cases such as altNames, a list of dictionaries (in python nomenclature). Additionally, we have functionalKinds whose value is ['Content Vendor', 'Content Producer', 'Content Organization'], which is a list or array. Finally, we have status, which is a single dictionary. All these different structures mean that simply leaving them as-is will make it easier to manage.
{'_id': ObjectId('62b48af4a7e7240012c35812'),
 'id': 'b85a125c-5d61-46cc-940f-56daa88368d8',
 'kind': 'Organization',
 'name': '10th Ave Animation Inc.',
 'parentOrganizationId': '4911a544-e3be-4f16-b2f6-92e9ee166ab1',
 'altNames': [{'id': '02d51d7e-f12c-491f-ac8f-0e5f7efe2c8b',
   'name': '10e Ave Animation inc.',
   'tags': []},
  {'id': '85f5ba95-3672-45b8-bc68-85065947a8ae',
   'name': '10th Ave Animation',
   'tags': ['AKA']}],
 'identifiers': [{'id': 'a48c3b44-16dc-42f2-94dc-0de6804932ac',
   'scope': 'HTTP',
   'value': 'https://10ave.com/10e-ave-animation/',
   'isDead': False,
   'externalURL': 'https://10ave.com/10e-ave-animation/'}],
 'functionalKinds': ['Content Vendor',
  'Content Producer',
  'Content Organization'],
 'contentTypeIds': ['eda78c92-a64c-4660-bb2a-f408699a1615',
  'e7a539fe-1574-4f1b-b1e9-928f4e4c31b2',
  'c114725e-4fd4-4fae-a7bb-6574cd3cb69b',
  '225cc11b-5d61-4d10-983a-08f8aa55ebf0'],
 'legalForm': 'Subsidiary',
 'status': {'activeAsOfYear': 2018, 'isActive': True}
 ...trucated...
Load MongoDB Data into Snowflake
We'll start by getting our data into our data warehouse, Snowflake. While we could develop complex solutions for loading data, the most robust way I've found is to use an off-the-shelf connector framework that understands how to sync your data from MongoDB to Snowflake. My favorite tool for this is Fivetran. They have a huge connector selection.
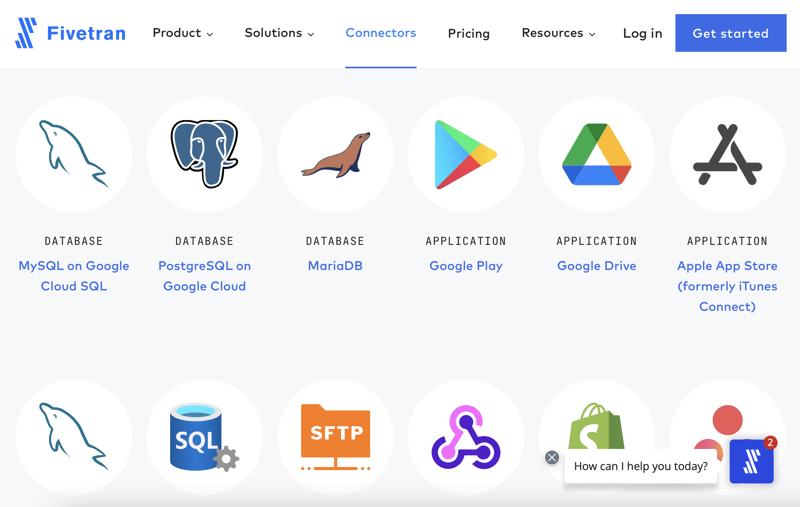
I won't cover the details of syncing the data, but it's as simple as authenticating both source and destination and configuring how you want the data to be synced. Depending on how much data you have, this could take minutes to hours to days. For me, Fivetran did the sync in 10 minutes. Once the data is synced, you can query it in Snowflake.
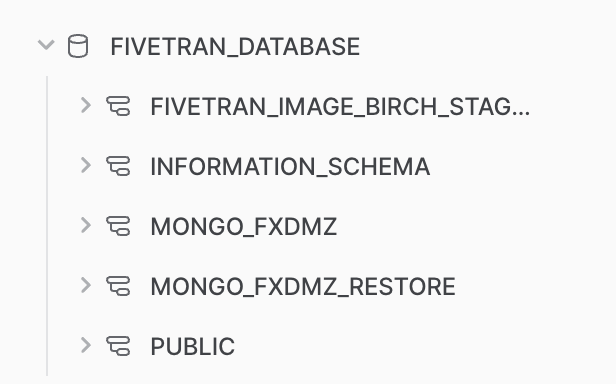
Inspecting the Initial Data Sync
When data loads into Snowflake, it will be in a dedicated database for Fivetran. Fivetran will also add extra metadata to the tables for sync information. These tables are not intended to be worked off of directly. While you can, it's not recommended. Instead, you should create views based on the tables that Fivetran creates. Creating views will allow you to change the data without affecting the original data. You can also create views based on multiple tables or extract data from a single table into multiple tables to create a more normalized view of the data.
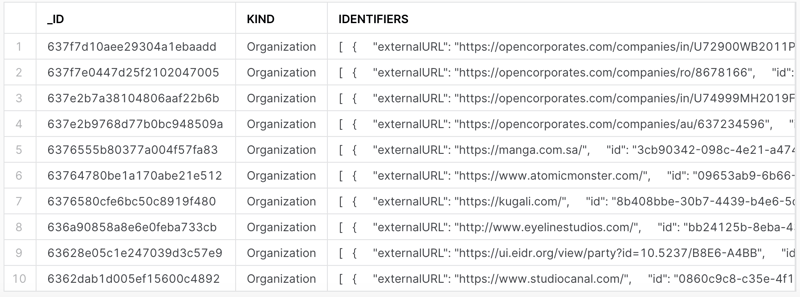
Let's start by inspecting the data. Assuming I have the proper database and schema selected, I can do a simple query to see what data is in each table. Let's take a look at the participants table.
select * from participants limit 10;
We can quickly see that the key-value pairs that were simple top-level keys were extracted as columns. Any key with more complex data (also known as sub-documents in MongoDB) was extracted as JSON strings, like IDENTIFIERS in the image below.
Let's take a look at the JSON for a single row. Notice we have a list (denoted by the starting [) followed by a repeating dictionary of 5 key-value pairs.
[
  {
    "externalURL": "https://ui.eidr.org/view/party?id=10.5237/B8E6-A4BB",
    "id": "4b361090-ed3e-4b3f-a0e0-96d9b79801eb",
    "isDead": false,
    "scope": "eidr.com",
    "value": "10.5237/B8E6-A4BB"
  },
  {
    "externalURL": "https://blumhouse.com/",
    "id": "2e6bd29f-914b-4a49-a227-001c25a01ffd",
    "isDead": false,
    "scope": "HTTP",
    "value": "https://blumhouse.com/"
  }
]
...trucated...
Time to start breaking these columns out into their tables (or views. more on that later).
Normalize MongoDB Data in Snowflake
We need to transform this into a relational way that makes more sense for a normalized data model. We need the participant's unique identifier, and the field in our data is the id field in the JSON. Then we need to create a table that "fans out" the data into several rows for each dictionary entry where the keys are the names of the columns, and the values are the values in the column.
To do this, we can use the FLATTEN function in Snowflake and a LATERAL join to connect it back to the data.
Expanding a List of Strings
We'll start with one of the simpler solutions: a list of strings from functionalKinds, the easiest to unpack.
select id as Org_Id
     , value::varchar(256) as Org_Functional_Types
from participants,
lateral flatten(input => functional_kinds)
where id = '4e4af5c6-5688-412b-9520-ad36e591d7e2';

We can see each unique ID and have a row for each entry in the list! Let's break down what's happening.
select id: Here, we're bringing in the unique identifier for this participant record. It will help us when we want to join this data back to the original data.value::varchar(256) as: this select statement works in conjunction with theflattenfunction. The keywordvalueis related to the termkeyandvaluepair. Both will work in the select statement. But for us, we only need the value, so we'll use that. We must also cast the value to a string with the::varchar(256)syntax. Theflattenfunction will return the value as avarianttype.lateral flatten(input => functional_kinds): tells the query that we want to flatten the JSON from the fieldfunctional_kinds.where: This is a filter for the demonstration and testing. Just remove it when you're ready to get all rows.
We use the above pattern we'll repeat with other nested JSON. Let's look at a list of dictionaries next.
Expanding a List of Dictionaries
The list of dictionaries is essentially the same, even though Snowflake will return the query results very differently. Let's take a look at the query.
select id as Org_Id
     , value:id::varchar(256) as Org_Identifiers_Id
     , value:externalURL::varchar(256) as Org_Identifiers_External_URL
     , value:isDead::boolean as Org_Identifiers_IsDead
     , value:scope::varchar(256) as Org_Identifiers_Scope
     , value:value::varchar(256) as Org_Identifiers_Value
from participants,
lateral flatten(input => identifiers)
where id = '4e4af5c6-5688-412b-9520-ad36e591d7e2';

And the results. Notice that we have a single row for each dictionary entry in the JSON and a column for each key! Let's break down what's different this time.
value:id::varchar(256) as: This is the same as the previous query, but we're adding the key id to the select statement, which instructs the query to extract a specific key from the dictionary. We must repeat this for each of the keys we want to have in our final view. That's it; the pattern for the rest is the same.
Expanding a Dictionary
Expanding a single dictionary is a use case that is a little different. In the previous two, we had multiple entries we needed to convert into their tables. This time we have a single dictionary of key-value pairs that we can convert into columns.
The status field for our sample participant looks like this.
{
  "activeAsOfYear": 2000,
  "inactiveAsOfYear": null,
  "isActive": true
}
To break those into columns when we query, we don't have to use the flatten function, and we can use the value keyword in the select statement.
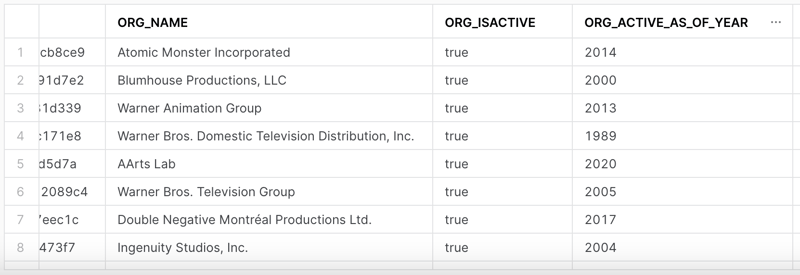
select    id as Org_ID
        , name as org_name
        , status:isActive as org_isActive
        , status:activeAsOfYear as org_Active_As_Of_Year
        , status:inactiveAsOfYear as org_Inactive_As_Of_Year
        , status:inactivityCause as org_Inactivity_Cause
from participants;
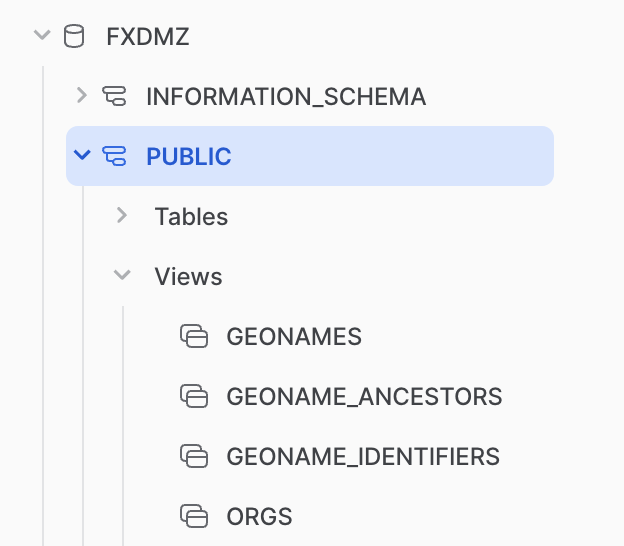
Creating Views
As mentioned earlier in the article, we don't want to operate off of the sync data from Fivetran but rather create a series of normalized views for us to query and use in Data Science projects. Now that we have the building blocks of creating the right tables for our nested data, we can create a view for each of the "tables" we want to have in our data model.
This process is super easy. We're going to start by creating a new Database that will be the destination for our new views. You can do this with the Snowflake UI if you wish. Then, use the command create or replace view and the name of the view you want to create. Then you can use the as keyword to define the query that Snowflake will use to create the view. Here's an example.
create or replace view org_functional_types as
select id as Org_Id
     , value::varchar(256) as Org_Functional_Types
from fivetran_database.mongo.participants,
lateral flatten(input => functional_kinds);
The or replace allows you to update this view very quickly. Because this is just a View into the Fivetran data, we're changing how the data is presented, and it's always referring back to the original data.
Notice that we're using the fully qualified path (fivetran_database.mongo.participants) in the Fivetran table; ensure that you're querying the table from Fivetran while trying to write in your new Database.
Conclusion
MongoDB is a powerful back-end database that powers many applications. As a data scientist or analyst, you will come across MongoDB and need to know how to transform it to work in a way that works for you. This article covered syncing the data with Fivetran, a powerful connector framework that automatically syncs and ingests data. We then covered how JSON data is stored in Snowflake and how to extract the data into their normalized queries. Finally, we wrapped those queries in views to create a separate, normalized view of your MongoDB data. Happy querying!